The Definitive Guide to Editing on CapCut

Last Updated on August 30, 2025 by Mike S
CapCut has fundamentally changed video editing, making powerful tools accessible to everyone. It is a free application that has become a go-to choice for creators, especially those who make content for social media platforms like TikTok. CapCut is available on both mobile from Google Play Store on Android phones or Apple Store on iPhones and PC on Windows or MAC, which means you can edit anywhere you are. Its intuitive interface and a wide range of features allow you to bring your creative ideas to life without needing expensive software or a steep learning curve. The app is a versatile tool for hobbyists and small business owners alike. It provides a simple path to creating high-quality, engaging videos for your social media channels or personal projects.
Understanding the CapCut Layout
Getting familiar with CapCut’s interface is the first step toward a smooth editing experience. The layout is designed to be user-friendly, and it has a few key areas that you will use frequently.
First, you have the Timeline. This is the heart of your project, where you organize and edit all your video clips, audio tracks, and text layers. All your media appears at the bottom of the screen in this timeline after you upload it.
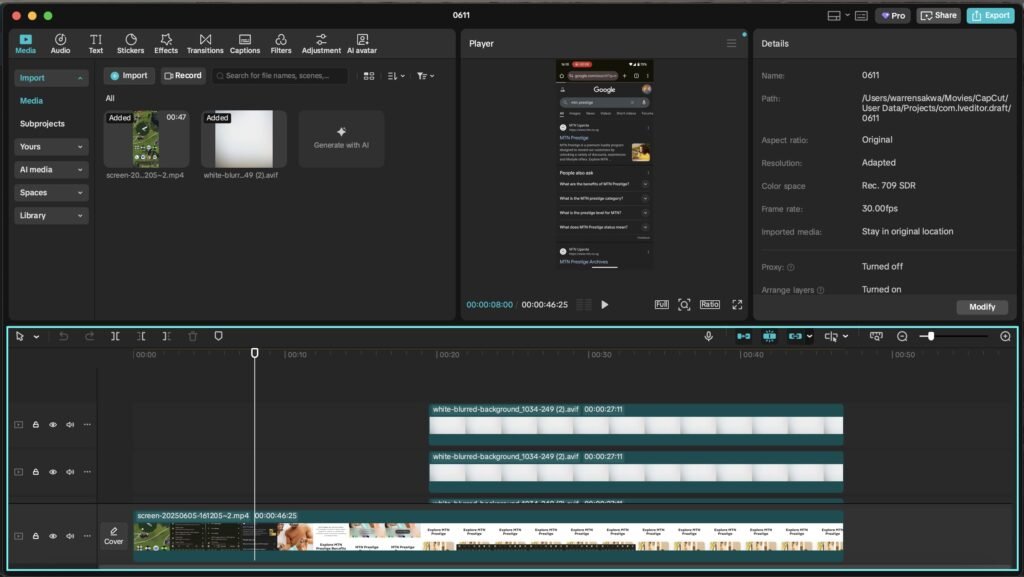
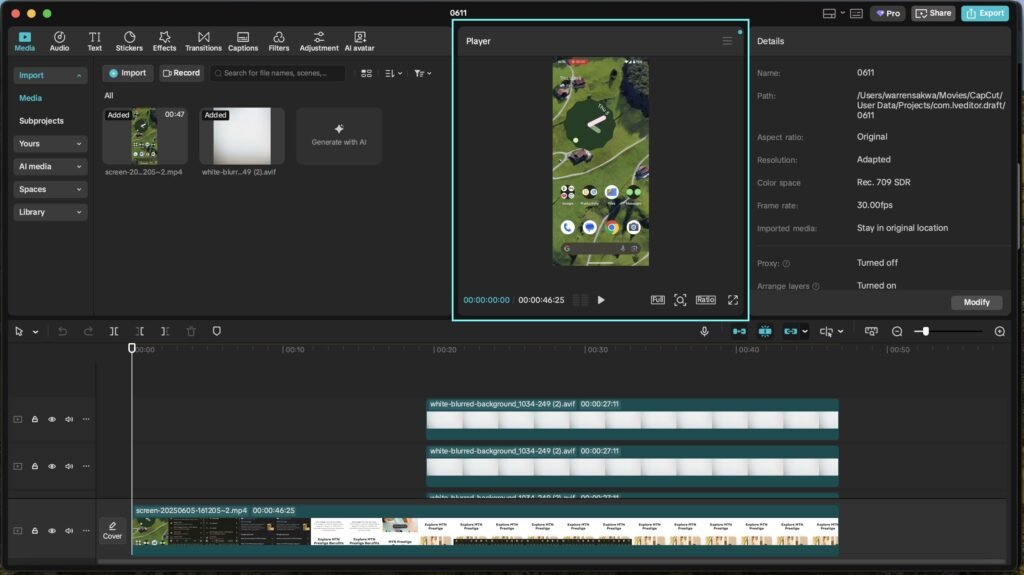
Next is the Preview Window. As you make changes to your project, you can watch them in real-time in this window. This is a critical feature that helps you see exactly how your video will look, ensuring every edit is precise.
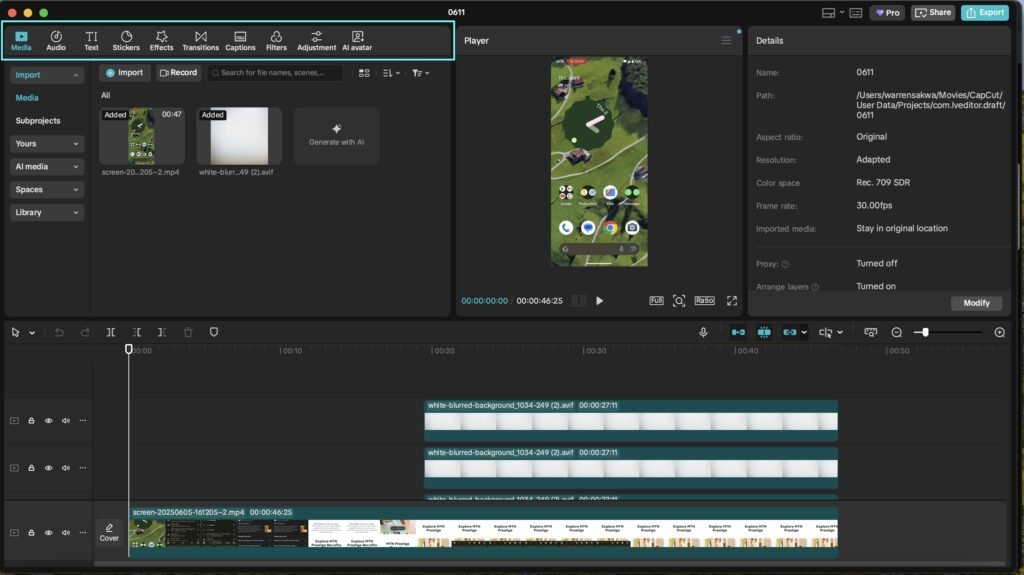
The Toolbox or Toolbar is where you find all your editing buttons. This area contains essential tools like trimming, splitting, cropping, and adding effects. The specific layout and location of these tools may shift slightly between the mobile and PC versions of the app.
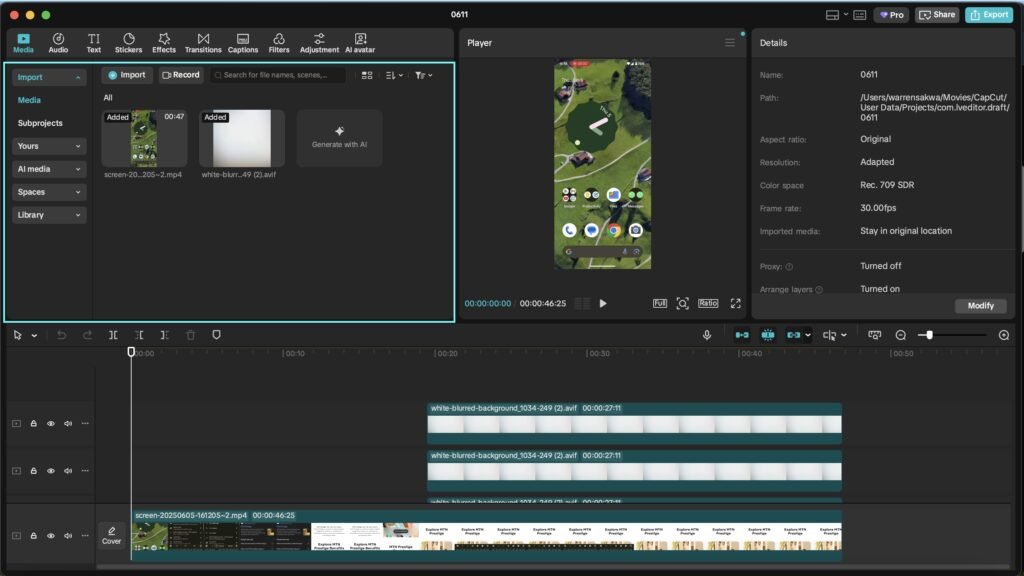
Finally, the Media Library is your hub for all imported files. This is where you store your video clips, images, and audio, making them easy to access and add to your timeline. Once you understand how these areas work together, you will find it much easier to navigate the app and start creating.
CapCut Mobile vs. CapCut PC: Which Is Right for You?
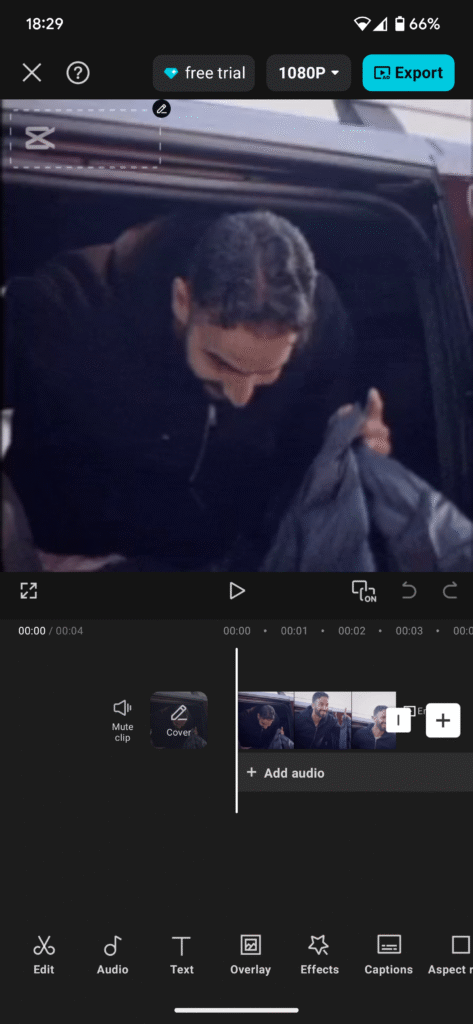
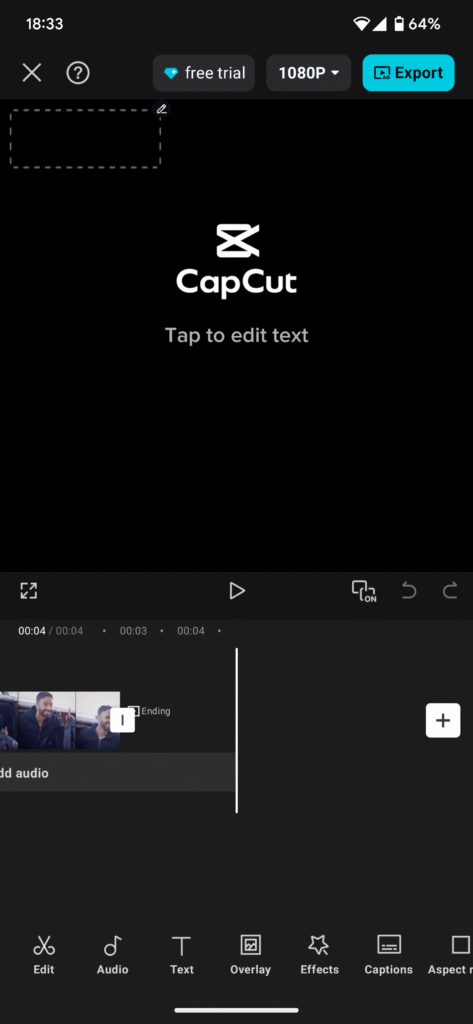
One of the first questions you might ask is whether to use CapCut on your phone or on your computer. This decision often depends on the kind of work you plan to do. CapCut is available for both mobile and PC, but the experience is quite different.
The CapCut Mobile app is perfect for editing on the go. Its interface is designed to be intuitive for touchscreen use. Some users even prefer its layout, finding it more efficient for quick edits. The mobile app also has certain effects and templates that are not available on the desktop version, which can be a key factor for creators who focus on trending social media content. However, editing on a small screen can be a challenge, especially if you have to work with multiple layers or make very precise cuts.
In contrast, CapCut PC is an excellent choice for more detailed and intricate work. A larger screen, combined with a mouse and keyboard shortcuts, allows you to see greater detail and work with layers more efficiently. This is particularly useful for complex projects that require a high degree of precision. While the desktop layout is different from the mobile one, many users find it is a much more efficient workflow once they get used to it. The PC version also offers advanced Pro features that are not on mobile, such as Camera Tracking and Vocal Isolation, making it ideal for professional-grade content.
A beginner might not realize that the choice between mobile and PC is not just a matter of convenience; it is about the kind of editing you intend to perform. A user who finds mobile editing a “massive pain” due to “fat fingers” will naturally gravitate toward the PC. Conversely, a content creator who needs to see how a video will look on a phone screen before finalizing it might prefer the mobile app. The ideal choice for you depends on your specific goals and workflow. The following table provides a quick comparison to help you decide.
ALSO READ : Gemini vs. The Competition: A Deep Dive into Google’s New AI
ALSO READ : GEMINI VS CHATGPT VS GROK VS DEEPSEEK
| Feature | CapCut Mobile | CapCut PC |
| User Interface | Intuitive, designed for touchscreen | Different layout, more space |
| Precision | Good for quick edits | Great for detailed, intricate work |
| Advanced Features | Some unique effects, templates | Advanced Pro features like Camera Tracking, Vocal Isolation |
| Portability | Highly portable, on-the-go editing | Not portable, requires a desktop or laptop |
| Screen Size | Small, can be cramped | Large, allows for greater detail |
| Keyboard Shortcuts | Limited | Robust, more efficient workflow |
The Foundational Skills: Basic Video Editing
How to Get Started: Creating Your First Project
Before you can make any changes, you need to start a project. The process is simple: open the CapCut app and tap “New Project”. From there, you will be prompted to import your media. You can select video clips and photos from your device’s gallery. If you do not have your own footage, CapCut also provides “Stock Materials,” which you can use for your project. Once you select your files, add them to your project to begin.
Adding and Organizing Your Video Clips
After you import your media, all of your video clips will appear at the bottom of the screen in your video timeline. This is the central workspace for your project. To start organizing your clips, simply drag them into the timeline in the order you want them to appear. You can also add more clips to your project at any time by dragging or uploading them directly to the editor.
How to Edit a Video: The Essentials
Once your clips are in the timeline, you can start editing them. Simply tap on a clip in the timeline, and a series of editing features will appear. These are your basic tools for shaping your video. The most important skills for a beginner include trimming, splitting, and deleting clips.
Trimming, Splitting, and Deleting Clips
Learning how to trim, split, and delete clips is fundamental to video editing. Trimming is the process of shortening a video clip. You can do this by dragging the edges of your clip in the timeline. This simple action allows you to cut out any unnecessary parts and focus on the best moments, which instantly improves your video’s pace and impact.
Splitting is different from trimming. It is used to break a single, long video into shorter, separate segments. To split a clip, position the white playhead where you want to make the cut, then tap the “Split” button. A long video can be broken into shorter clips. This action is more than just a simple cut; it is what allows you to edit specific parts of your video independently. For example, you can split a clip to add a transition, apply a different speed, or insert text or effects in just one section, which is the foundational step for creating more dynamic edits. After you have split your video, you can then delete any unwanted segments by selecting the clip and tapping the “Delete” button.
Adjusting Video Speed: Normal vs. Curve
Adjusting the speed of your footage can create dramatic or energetic effects, which is especially popular for TikTok videos. CapCut provides two main ways to control video speed: “Normal” and “Curve.”
Normal speed allows you to speed up or slow down the entire clip uniformly using a simple slider. Anything below 1.0x will slow the clip down, while anything above 1.0x will speed it up. This is a straightforward method for simple time-lapse or slow-motion effects.
For a more creative and dynamic effect, you can use the Curve speed option. This tool lets you vary the speed at different points within a single clip. It presents a graph where you can drag dots, or “beats,” up or down to change the speed. Dragging a dot up speeds up that section, while dragging it down slows it down. This is the primary method for creating a true velocity edit, where speed changes are precisely timed to the rhythm of music. When slowing a video down, remember that it might affect the quality, especially if your original video has a low frame rate.
While CapCut has an Auto Velocity feature that uses AI to create a velocity edit for you with a single tap , the Curve tool provides complete manual control. The one-tap Auto Velocity feature is a great starting point for a beginner who wants to achieve the popular effect quickly. The Curve method is for creators who want to take full control and create a truly custom edit.
Bringing Your Video to Life: Adding Creative Elements
Adding Audio: Music, Sound Effects, and Voiceovers
Audio is a key part of any video, and CapCut gives you four easy options to add sound. You can add Sounds, which are music tracks from CapCut’s large library or from your own imported files. You can also use Effects for short sound clips like a whoosh or a bang. If you want to use the audio from another video, you can tap on Extracted to pull the sound from a clip in your camera roll. Lastly, the
Voiceover feature lets you record your own narration directly into your project. Once you add an audio track, it appears below your video clips in the timeline, where you can move and trim it to match your video. To make your video look professional, it is important to sync your audio with your video clips.
How to Edit Text on CapCut: The Ultimate Guide
Adding text to your video is an easy way to make it more informative and engaging. To add text, just tap the “Text” tool, then select “Add Text”. You can type your message into the text box that appears. Once you have added your text, you can move and resize the text box on the screen by dragging it to your desired position. In the timeline, you can also adjust the text clip’s duration, deciding when the text appears and disappears.
ALSO READ : How to use ChatGPT
Customizing Text: Fonts, Colors, and Style
CapCut gives you many ways to customize your text. After you select your text box, you can change the font, size, and style. You can also adjust the color and add stroke or shadow effects to make your text stand out, especially against a bright or busy background. For social media videos, bold fonts are great for creating eye-catching text, while elegant fonts work well for a more cinematic feel. This shows that a simple choice of font and style can significantly change the mood of your video.
Making Text Move: Animate Your Text
Adding animation to your text makes it dynamic and helps you capture the viewer’s attention. To animate your text, select the text layer and then tap on the “Animation” feature. You have three main options: “In” animations, “Out” animations, and “Loop” animations.
- In Animations are effects that make your text appear dynamically, such as a fade-in, a zoom, or a typewriter effect.
- Out Animations are for making your text disappear stylishly, like a slide-out or a glitch effect.
- Loop Animations make your text move continuously, like a wave or a bounce.
You can experiment with different animations to find one that best complements your video and reinforces your key message.
Add Captions: Automatic and Manual Captions
Captions are essential for accessibility and for reaching people who watch videos without sound. CapCut makes it easy to add them. You can generate captions automatically by clicking “Auto Captions” and choosing the language of your video. The app will then transcribe the audio for you. While this AI-powered feature saves a lot of time, the captions may have some accuracy issues, especially if the original audio is of low quality. For this reason, you should always review the generated text and manually edit it to fix any errors. You can also adjust the captions’ duration, placement, and style, just like any other text.
Using Effects, Filters, and Transitions
Once you have your clips and audio in place, you can add effects, filters, and transitions to take your video to the next level.
Transitions are used to create smooth visual shifts between clips. CapCut offers a variety of transition effects, such as fade, slide, and zoom. To add one, simply drag and drop it onto the timeline between two clips.
Effects and Filters can change the entire mood and style of your video. You can add filters to change the color grading for a warm, nostalgic vibe or use a black-and-white filter for drama. CapCut’s effects library also includes options like glitch effects or body effects to add a unique flair.
Mastering the Advanced Techniques
How to Make a CapCut Edit: Exploring AI Tools
CapCut’s AI tools are a powerful way to create professional-looking videos with minimal effort. Features like AI background removal, also known as Chroma Key, let you replace your video’s background with any image or video. This is a very useful feature for creators who want to create tutorials or skits. The AI also helps to make your videos more engaging. AI movement, for example, can automatically create camera shake, zooming, or panning effects, which saves you from having to do it manually.
How to Make a Velocity Edit on CapCut
The velocity edit is a viral editing style that syncs video speed changes to the rhythm of a song. CapCut provides two main ways to create this effect.
The first method is the One-Tap Method. This is perfect for beginners and those who want a quick result. After adding your video and audio, select your clip and tap on “Style”. From there, you can select “Auto Velocity” or “Flash” to have CapCut automatically generate the velocity edit for you. It does all the work, and you can simply preview the result and export it to your device.
The second method is the Manual Method, which gives you complete control over the effect. This is for creators who want a custom edit. After selecting your clip, tap on the “Speed” button and then select the “Curve” tab. This will open a graph where you can adjust the speed throughout the clip. You can drag the circle points, or “beats,” on the graph up to increase the speed or down to decrease it. The more you practice with this tool, the better you will become at creating precise and impactful velocity edits.
Advanced Tools: Green Screen and Chroma Key
The Green Screen effect is a popular advanced feature that lets you replace the background of your video with a different image or video. This is also called Chroma Key. To use it, you need to import a video that was filmed in front of a solid color background, typically green. CapCut’s Chroma Key tool can then identify that color and make it transparent, allowing you to layer another video or image behind it. This is ideal for creating professional-looking tutorials, comedy skits, or creative reaction videos.
Exploring Keyframes: The Power of Movement
For advanced control over animations, you can use Keyframes. A keyframe is a marker that saves the properties of a layer at a specific point in time, such as its position, size, or opacity. By setting two keyframes at different points in the timeline and changing the properties between them, you can create a smooth, custom animation. For example, you can set a keyframe to start with a tiny text box and another one later in the timeline with a larger text box, making the text smoothly zoom in over time. Keyframes give you a level of precision that goes beyond the basic “In/Out” animations.
Leveraging Community and Trends
How to Use CapCut Template: A Quick Guide
Templates are a great way to create high-quality, trending videos without having to start from scratch. They provide a pre-built structure that you can simply replace with your own photos or video clips. There are two main ways to find and use templates.
First, you can browse for templates directly within the CapCut app. Many templates are based on popular trends and can help you create a video that fits a specific style.
Second, and most popularly, you can find a template on TikTok. This is a seamless process. You find a video on TikTok with a CapCut icon above the caption. When you tap this icon, it will take you to the CapCut app with the template already loaded. All you have to do is tap “Use Template” and replace the placeholder clips with your own content. This deep integration between the two apps creates a simple, effective way for creators to jump on trends quickly.
Finalizing and Sharing Your Masterpiece
Previewing Your Video Before Export
Before you finish your video, it is crucial to watch the entire thing from start to finish. This final review step helps you catch any mistakes you may have missed during the editing process. For example, you can check for audio that is not synced correctly with the visuals, sudden changes in a clip that feel jarring, or any parts you meant to delete but forgot. This practice ensures that everything flows smoothly and your final video is as polished as possible.
How to Export Your Video: The Final Step
When you are happy with your video, it is time to export it. To do this, look for the “Export” button, which is usually in the top-right corner of the screen. When you click it, a menu will pop up with a number of customization options. You can change the name of your video, the resolution, the bit rate, the format, and the frame rate. For a high-quality video that looks great, it is recommended to use the highest resolution possible, such as 1080p or 4K, and a frame rate of 30 or 60 frames per second.
Best Export Settings for TikTok and Other Platforms
Choosing the right export settings is key to making sure your video looks great on its final platform. The right settings for TikTok may not be the same as for YouTube. Here is a quick guide to recommended export settings for popular platforms.
| Platform | Recommended Resolution | Recommended Frame Rate | Recommended Format |
| TikTok | 1080p | 30fps or 60fps | MP4 |
| Instagram Reels | 1080p | 30fps or 60fps | MP4 |
| YouTube Shorts | 1080p | 30fps or 60fps | MP4 |
| YouTube | 1080p or 4K | 30fps or 60fps | MP4 |
Essential Q&A: Troubleshooting & Pro Tips
Common User Issues
One of the most frustrating issues a user can face is a bug that prevents them from uploading files due to “insufficient storage,” even when their device has plenty of space. This glitch is most common when you set up a new account. A simple workaround is to create a new “space” within the app, which will allocate 5GB of storage and fix the problem.
Another common complaint from long-time users is that CapCut keeps moving some of its best effects and features to the Pro version, which requires a subscription. While this can be frustrating, the free version still provides an impressive amount of powerful tools for creating high-quality videos.
Top Tips from Pro Creators
Even with all the features, a few simple practices can help you work more efficiently.
- Organize Your Timeline: An organized timeline helps you stay focused and avoids confusion, making editing much more enjoyable.
- Save Frequently: Saving your work often is a simple habit that ensures you do not lose your progress if the app closes unexpectedly or something goes wrong.
- Preview Before Export: As mentioned earlier, taking the time to watch your final video is a critical step for catching any last-minute errors.
Velocity: A Quick Recap
Velocity editing is a powerful technique that uses dynamic speed changes to create a visually striking effect. Remember, you have two choices to make a velocity edit. You can use the Style menu and Auto Velocity for a quick, one-tap solution , or you can use the Curve feature for full, manual control over the speed changes to create a custom edit. Both methods can produce excellent results, so you can choose the one that fits your comfort level.
A Quick Word on CapCut Pro
While the free version of CapCut is incredibly powerful, you may eventually want to explore the Pro version. CapCut Pro offers a wider range of advanced features for video, audio, and image editing. Some of these features include Vocal Isolation to separate vocals from a song, Flicker Removal to fix inconsistent lighting, and AI Auto Reframe to instantly change your video’s aspect ratio while keeping the main subject in view. These tools are designed to streamline professional workflows and give you more creative control over your projects.